Configuring resources in the AskCody Portal
Learn how to set different resource scheduling settings in the AskCody Portal
Using AskCody resource scheduling to book and schedule meetings enables users to search for available meeting rooms and desks across multiple locations and time zones, fully integrated with Outlook and Office 365.
These settings define the options available for Bookings across the entire AskCody platform. By adjusting them, you can customize the options shown in the Bookings add-in for Outlook and the resource information displayed throughout the platform.
Employees can search and sort by the purpose of a meeting (e.g., video conference or external), equipment, or services (e.g., a whiteboard or catering), or capacity. This gives employees a better booking experience while driving meeting efficiency by securing the right meeting in the right room. To set up and configure these features for room filtering and search, we will set up the following in this section:
- Equipment and Services in the meeting rooms.
- Configuring meeting purposes
- Applying general information to the meeting room.
Equipment and Services in the meeting rooms
- Log in to the AskCody Management Portal.
- Click on the Admin Center on the left panel.
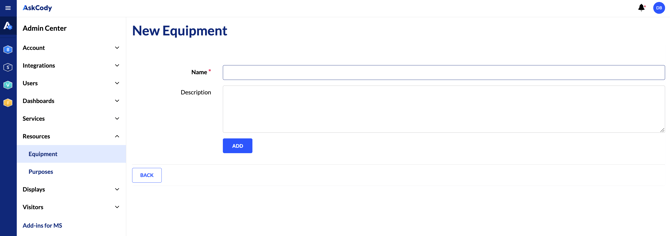
- In here, click Resources and choose Equipment.
- Click Add and create a specific type of equipment or service that is available for some or all of your meeting rooms, which should be added as a feature to that room, enabling employees to search for that feature. Features could be a video camera, a whiteboard, flip over, speakerphone, TV, projector, Surface Hub, Barco Clickshare, etc.
- You can add as many different types of in-room equipment or services that you offer or have available in your meeting rooms.
The equipment and service created will be applied to your meeting rooms when applying general information to the meeting room.
Configuring meeting purposes
- Click on the Admin Center on the left panel.
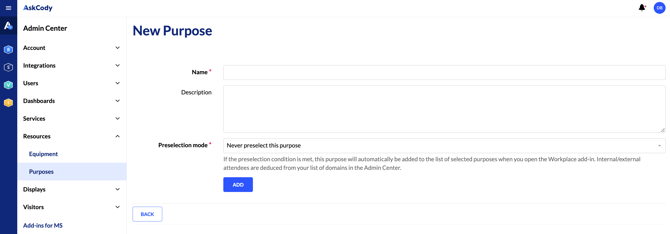
- In the Admin Center, click Resources and choose Purposes.
- Click Add and create a specific Purpose.
- A Purpose is defined by the purpose of meetings that is suited for a specific meeting room, like an internal meeting, a project meeting, an external meeting, video conference. You can add as many different purposes as you need.
The purposes created will be applied to your meeting rooms in the next step.

Preselection mode is a feature to ensure that a specific purpose is always preselected.
As an example, this feature can be used if a majority of the meeting has the same purpose, as an internal meeting, or if you want to drive a certain behavior in your organization. If your organization wants to drive a specific behavior for these types of meetings, enable preselection. If the preselection condition is met, this purpose will automatically be added to the list of selected purposes when employees open the Workplace add-in in Outlook or Office 365 to only show meeting rooms suited for internal meetings, excluding all other meeting rooms.
Applying meeting room or desk information

As the last step of creating and configuring meeting rooms, it’s time to apply the room features and purposes you just created, and apply the room information needed, like capacity and descriptions.
- Click on Bookings in the left panel.
- Click on Resources.
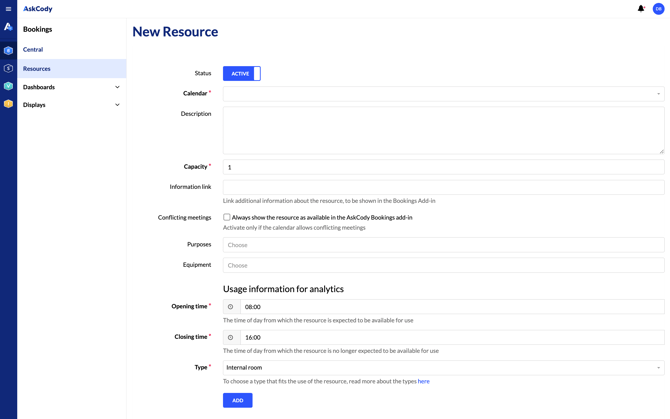
- Click Add and choose the meeting room calendar (the Exchange room mailbox) that you want to add.
- Fill in the needed information about the meeting room, description, capacity, and select the meeting purposes the room supports, and the in-room equipment featured by the room.
- If needed, the information link can provide additional context to an employee regarding the resource. Examples of what is typically included here are:
- A link to a map of the office, highlighting the room
- A link to a folder containing pictures of the meeting
- A link to a specific video explaining how to get to the room
The information link will be shown in the Bookings Add-in under each room/desk with a "More info" text:
- If needed, the information link can provide additional context to an employee regarding the resource. Examples of what is typically included here are:
- For Insights, opening hours and meeting room type should be set. This does not impact the ability to schedule meetings or book this room outside of opening hours. Opening hours are used to calculate utilization rates of the room in Workplace Insights. This can be edited at any time.
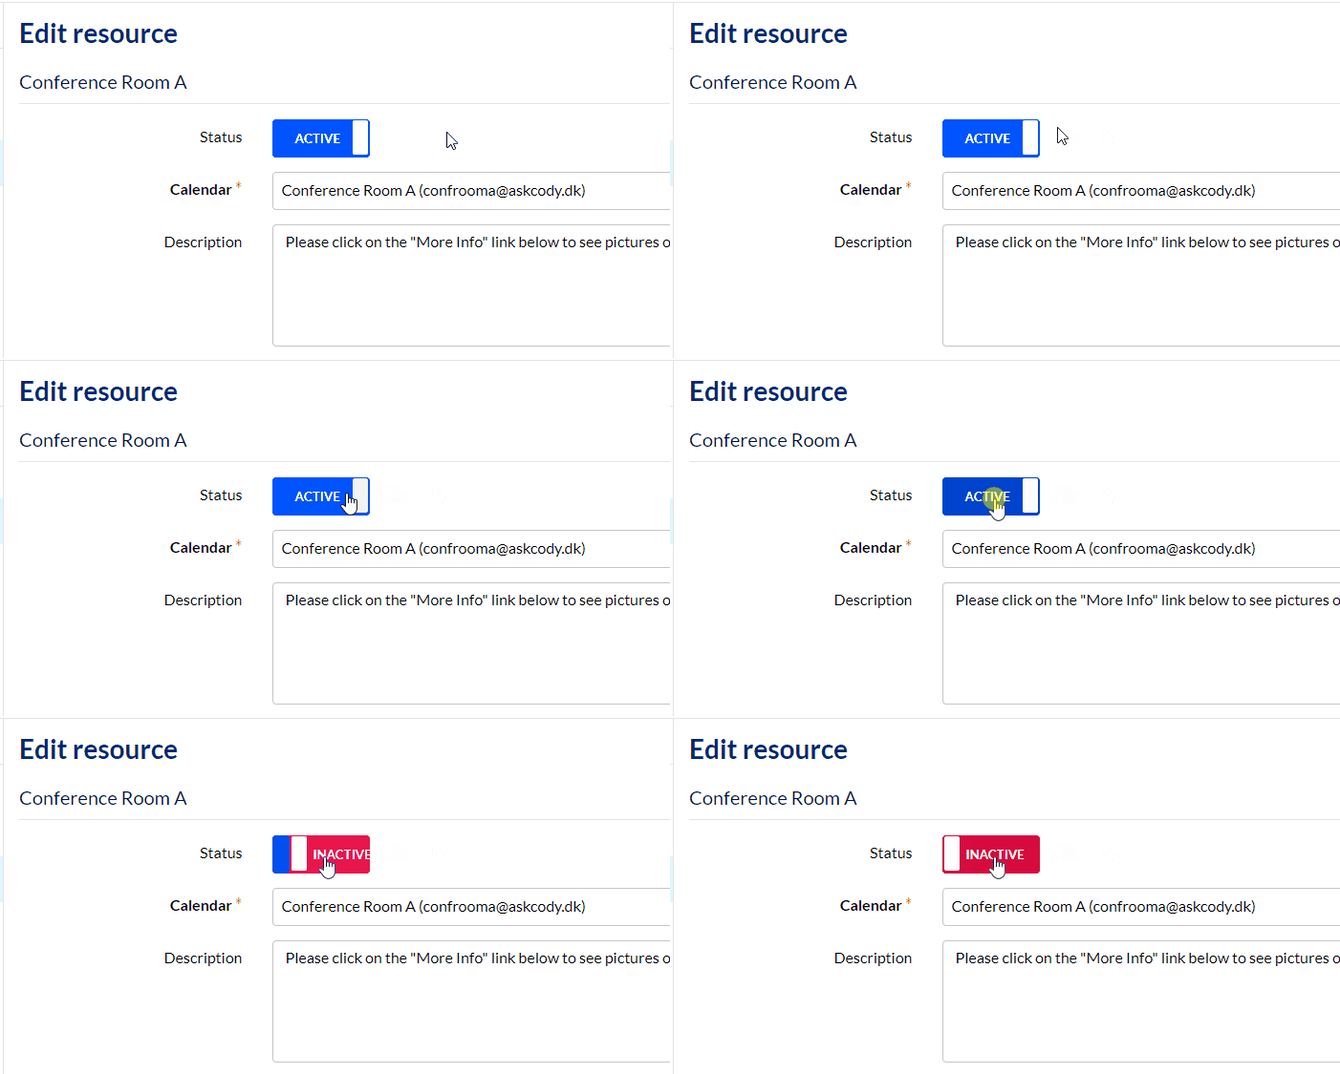
- To hide a room or desk in the Bookings Add-in for Outlook, you can set the status to "Inactive". This will hide the room in the Add-in for all employees in the organization:

Advanced Features for Resource Scheduling
With AskCody, you have the option to automate filtering options to allow users to find resources faster in the Bookings add-in. Click below to explore the different possibilities and learn how to set them up:
![Logo - Secondary White-1.png]](https://help.askcody.com/hs-fs/hubfs/Logo%20-%20Secondary%20White-1.png?height=50&name=Logo%20-%20Secondary%20White-1.png)
