Walkthrough of Services in the AskCody portal
Get familiarized with the AskCody Meeting Services Management Portal.
Log on the AskCody Meeting Management Portal and choose Services in the top left corner.
Here you can create/edit requests, items/services, categories, cost centers, and cost center groups. You will also be able to see a detailed list of upcoming, current, and past requests and control which users and rooms are connected to the Meeting Services Portal. All lists in the Meeting Services Portal can be exported as a print or a CSV file.
New request (Button)
Click on this button if you need to create a request on behalf of an employee. You will be presented with the complete same information as the employee using the Services Add-in to request a service. When creating a request directly in the Meeting Services Portal, the Portal will be the requester of the request. This request will be visible in the list exactly like the other requests.
Requests
The Requests tab consists of detailed lists allowing you to get a quick and extended overview of:
Current: A list of all active/current requests for this provider
Today: A list of all requests for today for this provider
Tomorrow: A list of all requests for tomorrow for this provider
Pending: A list of all requests pending acceptance or rejection for this provider
Accepted: A list of all requests accepted by this provider
Rejected: A list of all requests rejected by this provider
Readied: A list of all requests readied by this provider and ready for delivery or pickup
Completed: A list of all requests completed by this provider - will automatically happen when the delivery date and time have passed
Canceled: A list of all requests canceled within deadline by an end-user for this providerYou are also able to search for specific requests.
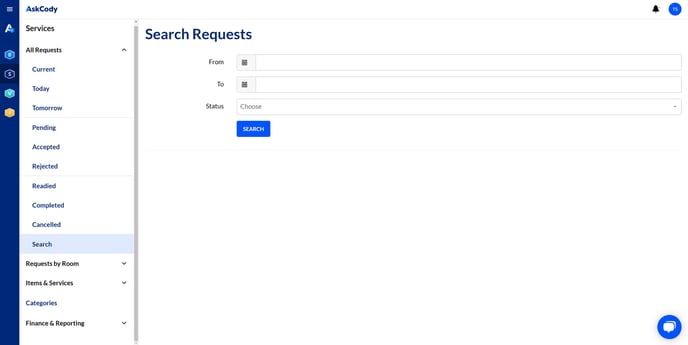
Search: Here you can make an advanced search in all your requests, both back in time and future requests. This is good if you want to get a more statistical view of your requests.
Room Filter
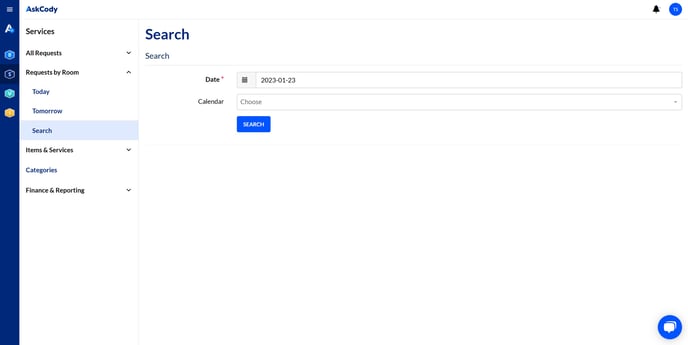
In the Rooms Filter tab, you are able to see which rooms have requests scheduled for today and tomorrow. This will give an insight into which rooms are the most active and what of kind items/services users usually request for each room.
You are also able to search for specific rooms with requests.
Items & Services
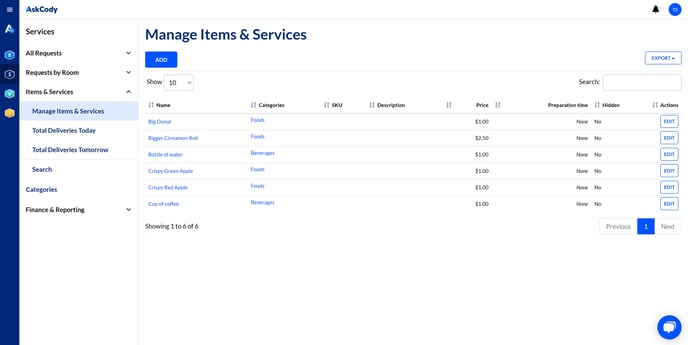
The Items & Services tab provides you with an overview of all the items and services that are currently available, as well as lists showing which items and services have been requested.
To create a new item/service, click Add, type in the relevant information regarding the item/service, and click Add. Items and services can be anything you would like, from single items to package deals or larger arrangements.
By clicking Search you can select a custom time span (e.g., a week or a month) and see the total amount of items and services that are included in the requests for the time span.
Preparation time
Preparation time determines the minimum time from request to delivery. This will prevent users from requesting an item/service to close to the delivery time. However, the organizational deadline for requests must also be kept.
To enable the preparation time feature, go to the provider in the Admin Center and check the box named Item/service preparation time. Now you can set the preparation time for each item/service.
To edit or delete an existing item/service, click Edit next to the item/service in question.
Categories
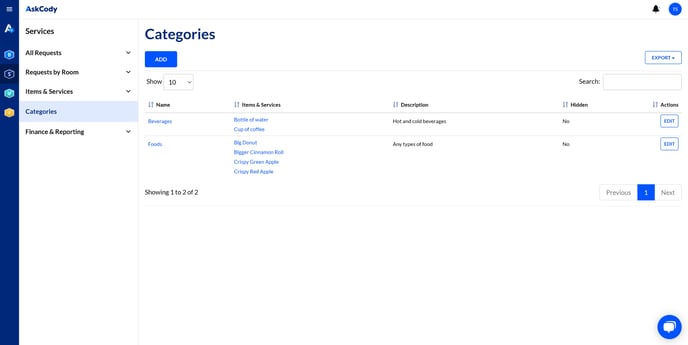
The Categories tab provides you with a simple overview of all the categories and the items and services within each category. A category makes organizing items and services extremely easy and gives you the option of simplifying the requesting process even more. Many AskCody users create specific categories for each type of meeting so that there are coffee and snacks for sales meetings and lunch for extended internal meetings.
To create a new category, click Add, type in the relevant information, what items and services should be related to this category, and click Add.
To edit or delete an existing category, click Edit next to the category in question.
Finance
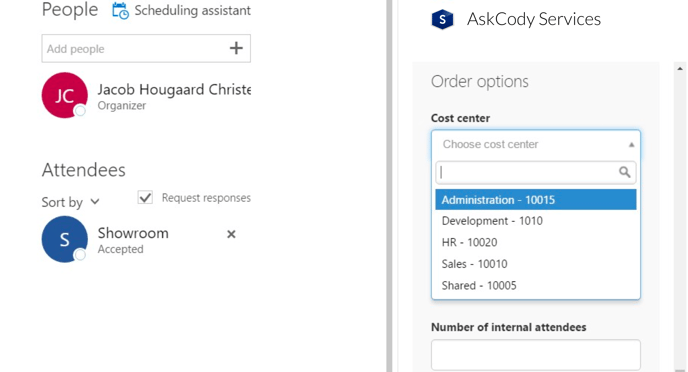
A cost center is an easy way for you to organize and keep track of service expenses from different departments, groups, or people within your organization. Read more about cost centers here.
To manage cost centers, click the Finance tab and select Cost centers on the menu at the top of the page.
This is a list showing the name, identification, and description of your current cost centers. The identification can be anything and is meant to help differentiate between cost centers in the accounting process.
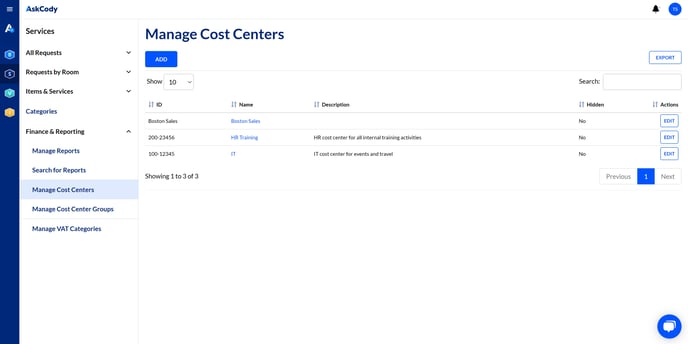
To create a cost center, click the Add button. Then add the identification and name.
The identification is/should be defined by the organization and is only used to differentiate between the different cost centers in billing situations. A description is optional.
The two most common scenarios for using cost centers
1. All cost centers are available to all users
This way of using cost centers is for organizations with a fairly limited amount of cost centers. This way of using cost centers usually revolves around the users being instructed to use the cost center that is associated with that user's department or group. This is the scenario shown above.
2. Cost centers are divided into groups. The different cost center groups are only visible to different predetermined users.
This way of using cost centers is for organizations with a larger amount of cost centers. By dividing cost centers into groups, they are to scroll through when using the add-in. However, when a cost center is allocated to a group, then it will only be accessible to the users appointed to that specific group. Users are appointed to a group through an AD synchronization. Read more about cost center group
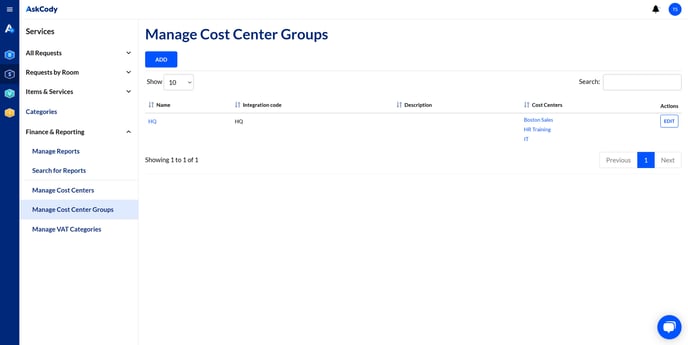
To create or edit a cost center group, choose Cost center groups in the Finance tab.
To create a new cost center group, click Add and fill out the fields with the required information. The code is/should be defined by the organization and is only used to differentiate between the different cost center groups in billing situations.
To edit a cost center group, click Edit next to the cost center group you wish to edit.
![Logo - Secondary White-1.png]](https://help.askcody.com/hs-fs/hubfs/Logo%20-%20Secondary%20White-1.png?height=50&name=Logo%20-%20Secondary%20White-1.png)