![Logo - Secondary White-1.png]](https://help.askcody.com/hs-fs/hubfs/Logo%20-%20Secondary%20White-1.png?height=50&name=Logo%20-%20Secondary%20White-1.png)
Info
This guide has been tested with the following Android and FW versions:
- Android 8.1
- FB01.03
There are two scenarios from which you can get started:
- Your hardware equipment has not been set up yet
- Your hardware equipment has the AskCody app installed and has a network connection set up, but the LED status lights do not follow the room availability status
For the first scenario, please click here. For the second scenario, please click here
First scenario
Your hardware equipment has not been set up yet- Download one of the following files according to your network infrastructure:
- If you will be using the hardware devices with an ethernet network connection, please download this .zip file.
- If you will be using the hardware devices with a wireless network connection, please download this .zip-file.
- Unzip the files onto an empty USB or SD card.
The USB or SD card, should only contain the following folders after unzipping the downloaded file above into it: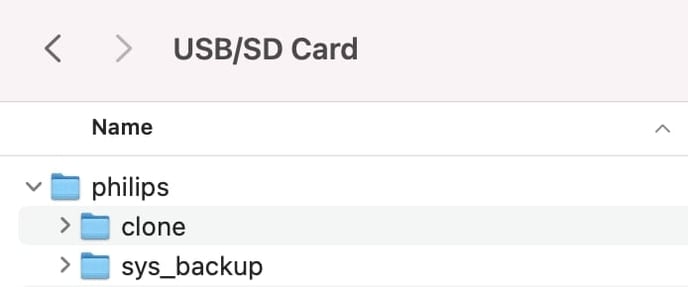
- Turn on the Philips display.
- Choose your preferred language and press "next".
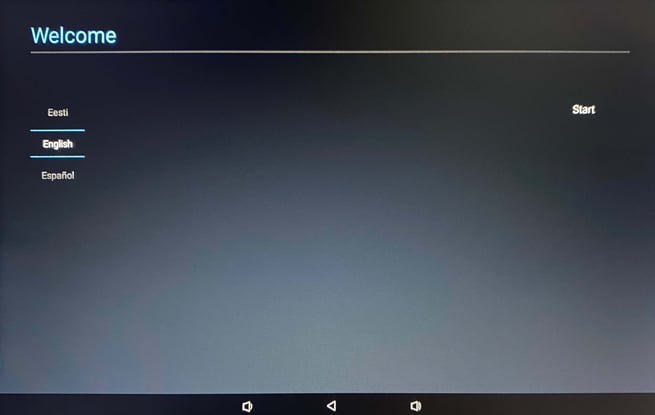
- Choose your preferred security settings and press "next".
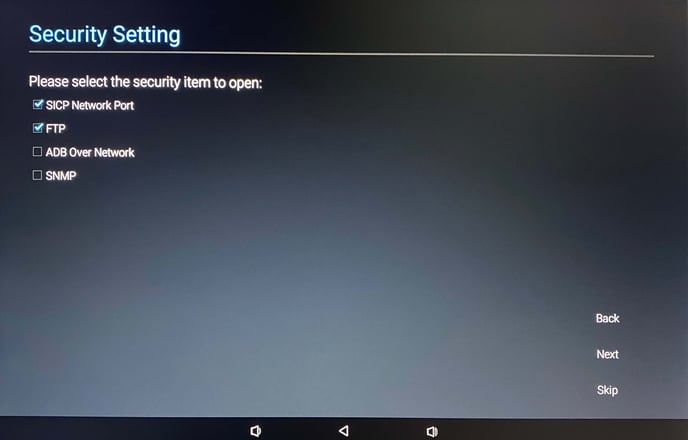
- Choose "Import Signage Display Settings from USB" or "Import Signage Display Settings from SD", depending on which option you chose to unzip the content on in step 1. Make sure the USB or SD card is inserted in the back of the display, and only contains the unzipped content provided in step 1. Press "next".
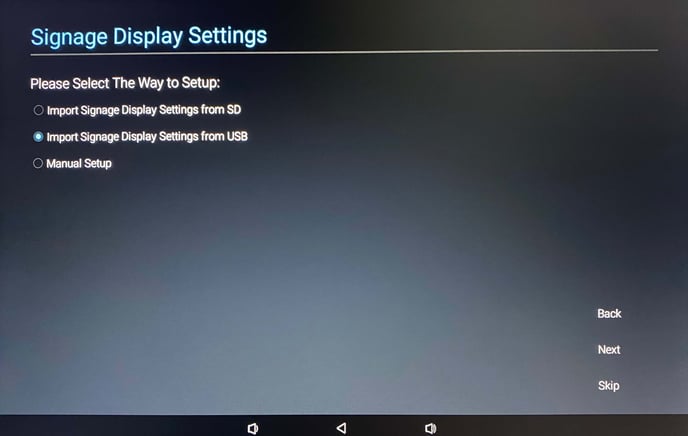
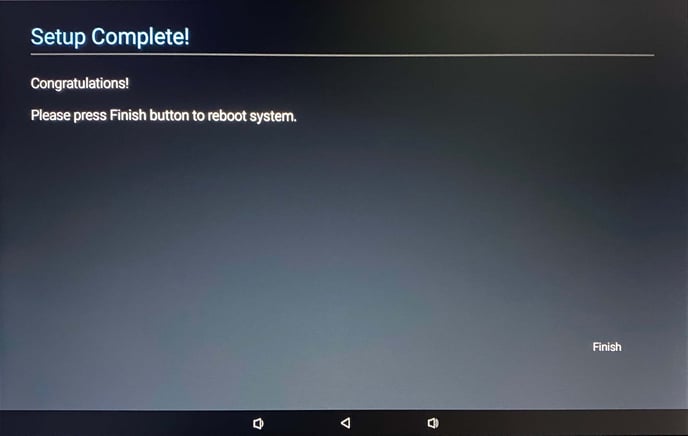
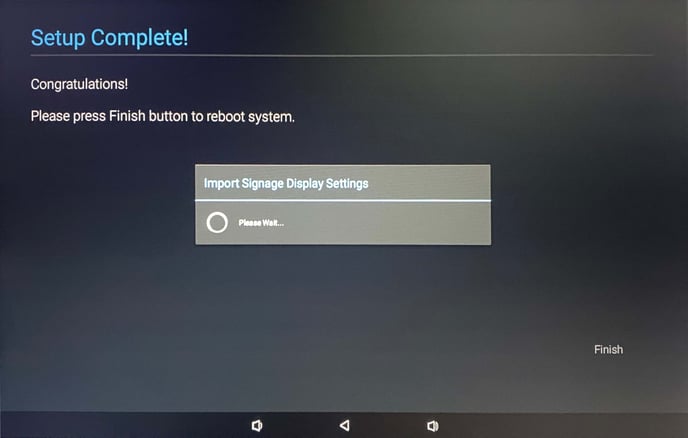
- Press "Finish". You should now see a pop-up message saying "Import Signage Display Settings". The device will restart.
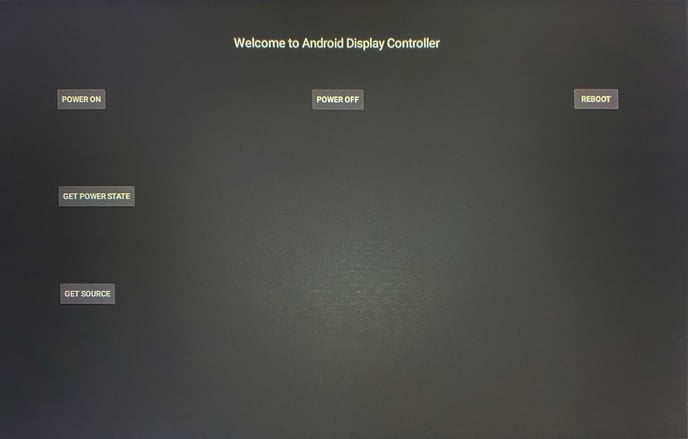
- When the device starts up, you should be met with a screen as below:
- On the back of the display, press the circular button(1.), immediately followed by pressing the volume down button (2.).
.jpg?width=688&name=MicrosoftTeams-image%20(4).jpg)
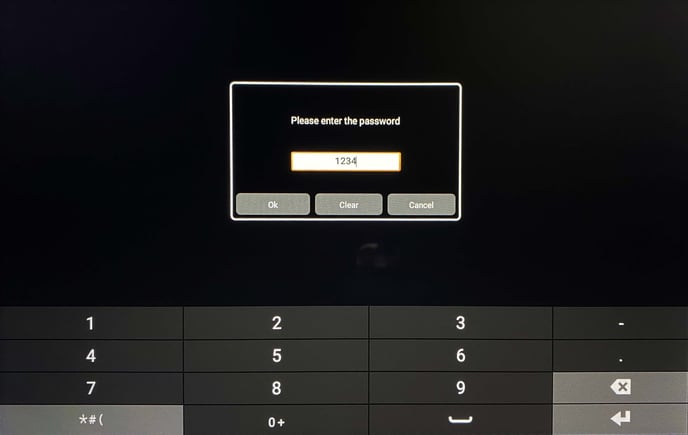
- Enter the password "1234" and press "Ok".
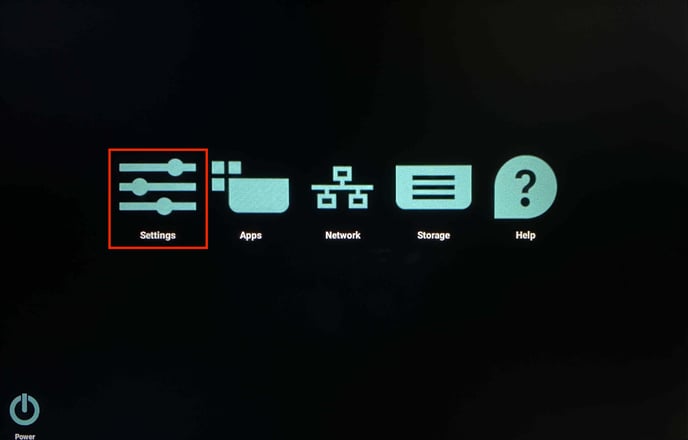
- If you are using the devices with an ethernet network connection, please skip to step 15. Press "Settings".
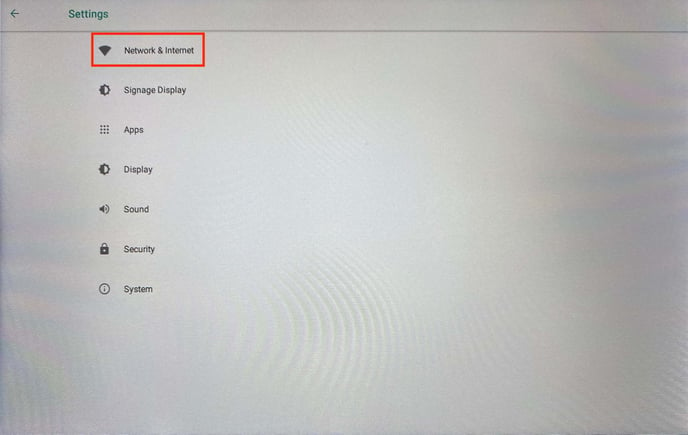
- Press "Network & Internet".
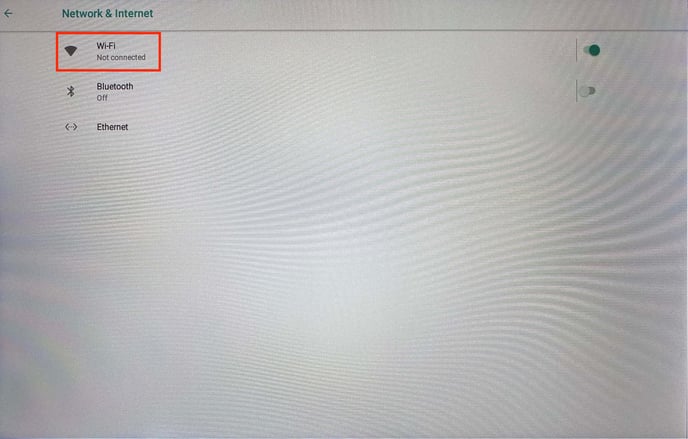
- Establish a network connection to your company's WiFi, if you don't use Power over Ethernet (PoE). Otherwise, please establish a network connection via Ethernet on the device.
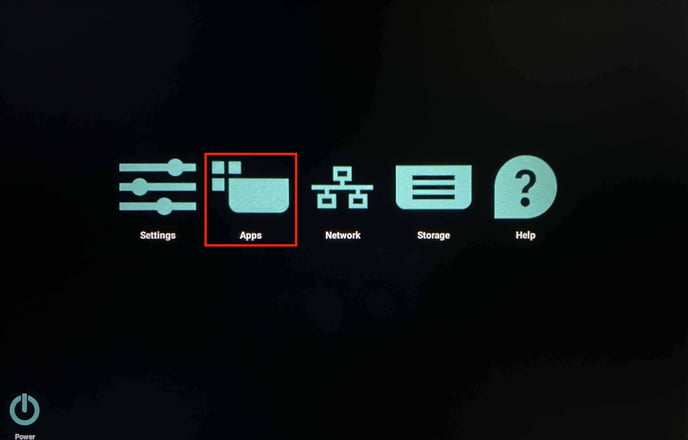
- Press on the back-arrow in the top left corner three times, until you are back on the screen shown below:
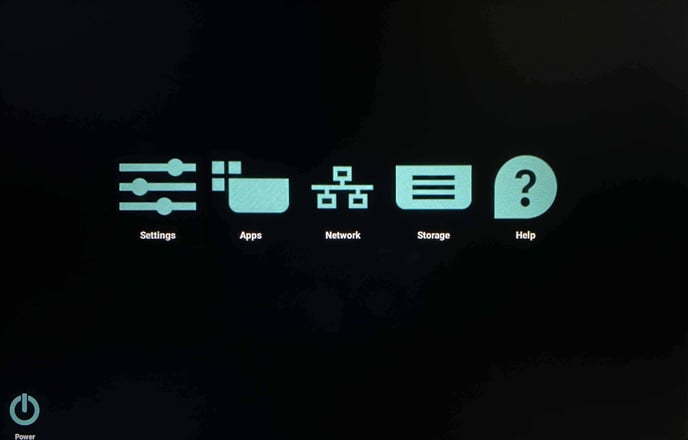
- Press "Apps".
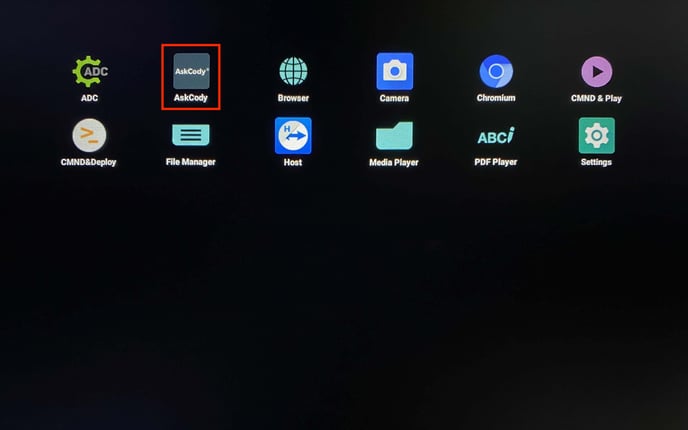
- Navigate to the AskCody App and open it.
- When presented with the below screen, please enter the license key for the desired Display you would like to be shown. You can find the license key for each of your room displays in the AskCody Management Portal.
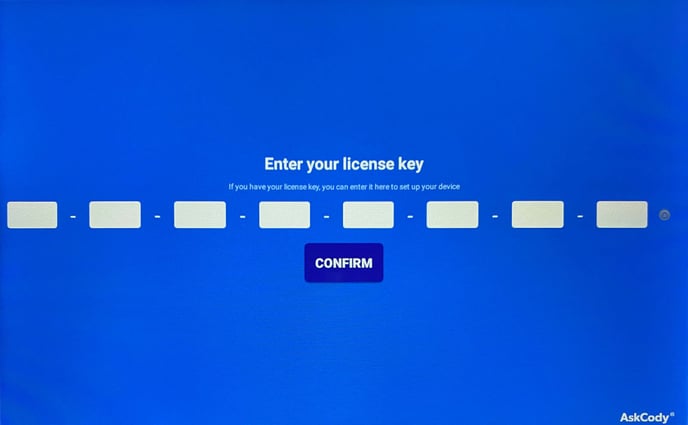
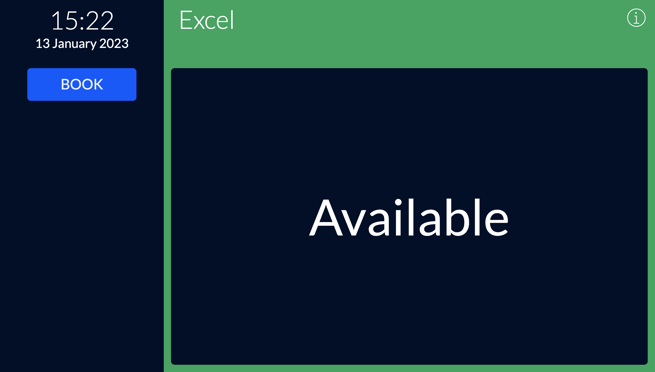
- After inserting the license key for the room and pressing on the "Confirm" button, the desired room display will be shown on the screen.
*NOTE: Please note, that if you at some point restart your device, you will be presented with an identical screen as seen in step 7. Simply wait 1 minute, and the device will automatically switch to the AskCody App.
Second scenario
Your hardware equipment has the AskCody app installed and has a network connection set up, but the LED status lights do not follow the room availability status.- Download one of the following files according to your network infrastructure:
- If you will be using the hardware devices with an ethernet network connection, please download this .zip file.
- If you will be using the hardware devices with a wireless network connection, please download this .zip-file.
-
- Turn on the Philips Display.
- On the back of the display, press the circular button (1.), immediately followed by pressing the volume down button (2).
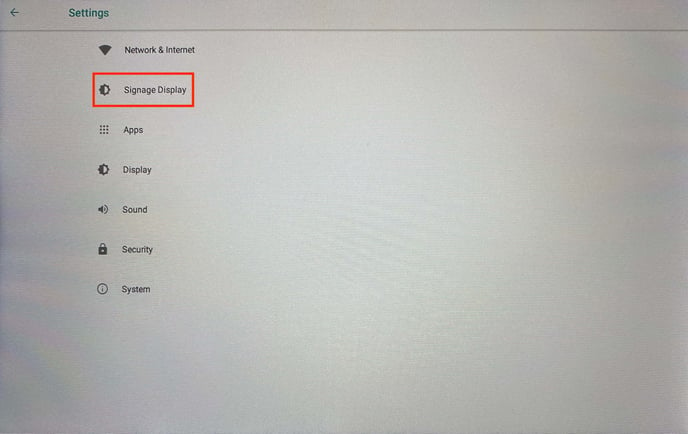
- Press "Settings".
- Press "Signage Display".
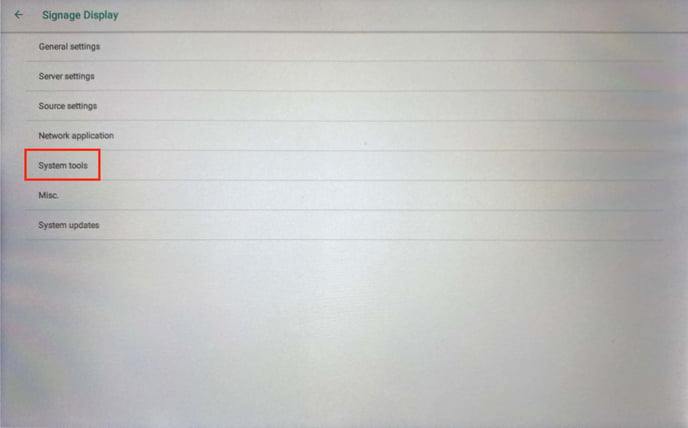
- Press "System Tools".
- Insert the USB or SD card into the back of the display. Make sure it only contains the content provided in step 1.
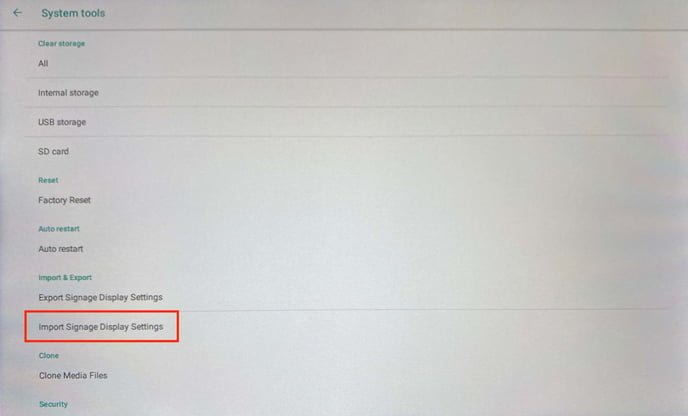
- Press "Import Signage Display Settings"
- In the following pop-up window, please choose the storage device you inserted on the back of the device in step 7. For this example, we will be choosing a USB storage device.
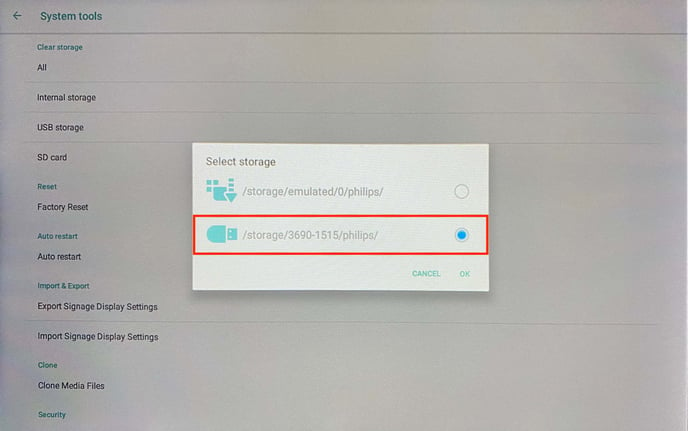
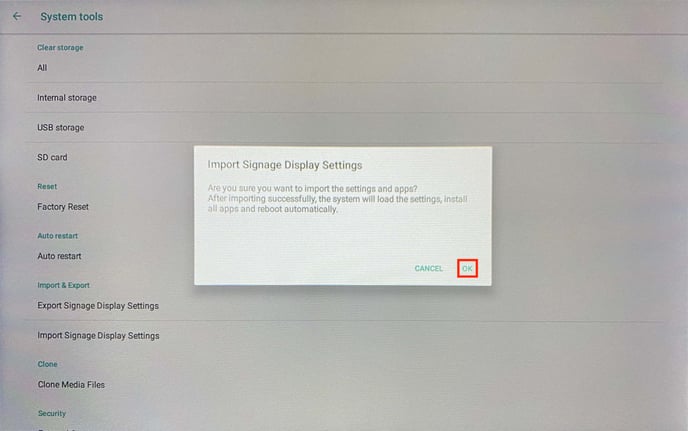
- In the confirmation window, please tap on "OK" at the bottom right of the pop-up.
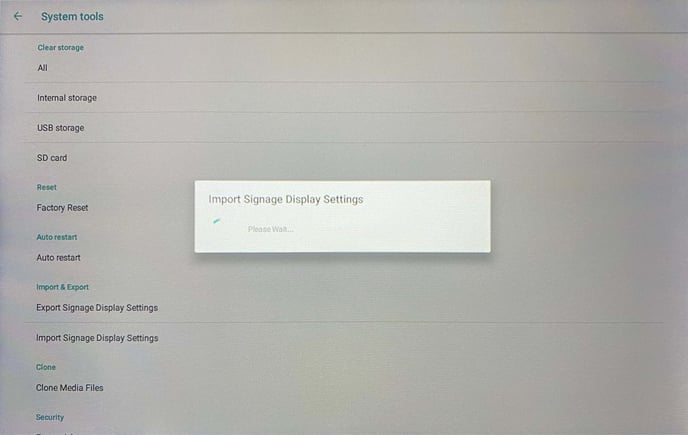
- The settings will start to import into the device.
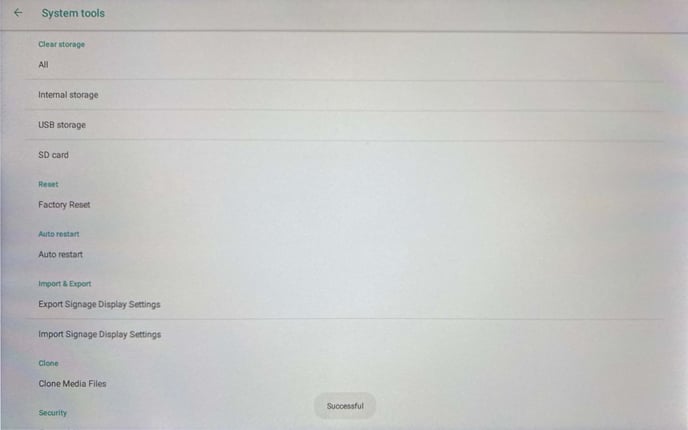
- The device will quickly show a "Successful" message at the bottom and will then restart.
- When the device boots up, you will be presented with the following screen.
- Please wait for about 1 minute, and then, the room display you had previously set up on the device, will appear on the screen.
After following these steps, your room displays will be shown on the Philips 10BDL4551T screen, and the LED status lights will follow the current room availability, showing red for occupied, and green for available.
*NOTE: Please note, that if you at some point restart your device, you will be presented with an identical screen as seen in step 7. Simply wait 1 minute, and the device will automatically switch to the AskCody App.