![Logo - Secondary White-1.png]](https://help.askcody.com/hs-fs/hubfs/Logo%20-%20Secondary%20White-1.png?height=50&name=Logo%20-%20Secondary%20White-1.png)
This is a small guide to create a distribution group in Exchange Admin that can be used to send e-mails to a list of contacts via only one email address.
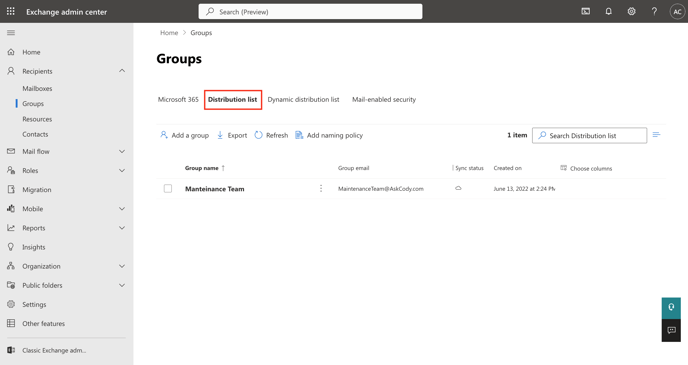
- Login to Exchange Admin Center
- Navigate to Recipients -> groups and click on Distribution list at the top
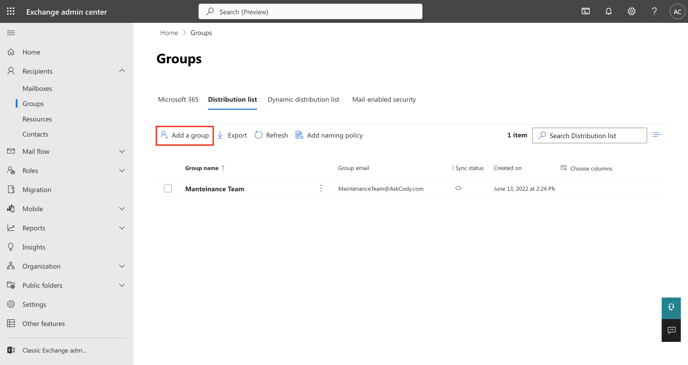
- Click on Add a group
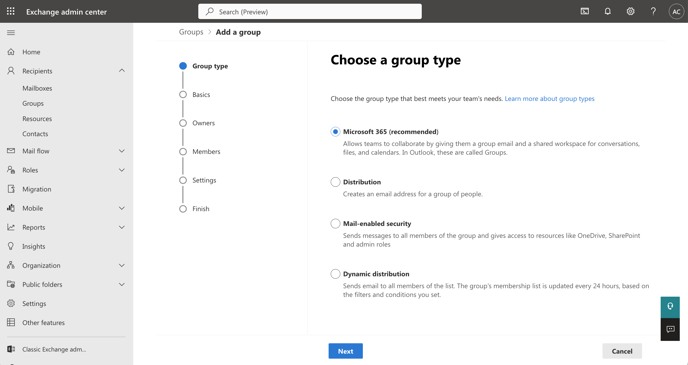
- Follow the steps of the assistant by choosing the group type that best fits your team's needs, give it a name, assign owners, add members, define the email address of the distribution list (group), and the privacy settings of it.
Once all the settings and details are in place, just click on Finish, and your distribution list should be created and ready to use, with members and owners added to it.