How do I connect to Exchange using Remote PowerShell?
Learn how to access your organization's Exchange Environment remotely using Microsoft PowerShell
For Exchange Online
- Open Windows PowerShell on your computer as administrator and enter the following command:
Install-Module -Name ExchangeOnlineManagement
This will install the necessary component to access Exchange Online via PowerShell.
If prompted, type "Y" and then hit the Enter key to confirm the installation. - The next step is to authenticate your user, which you can do by typing in the following command and then hitting the Enter key:
Connect-ExchangeOnline
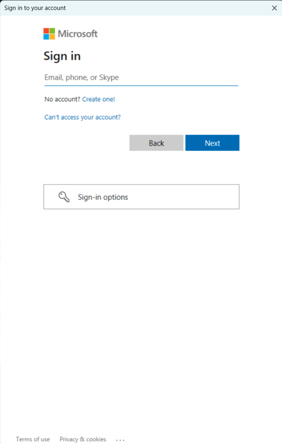
A sign in pop-up should appear. Type in the credentials of the account you want to access Exchange Online with (the account needs the Global Admin role within Exchange):

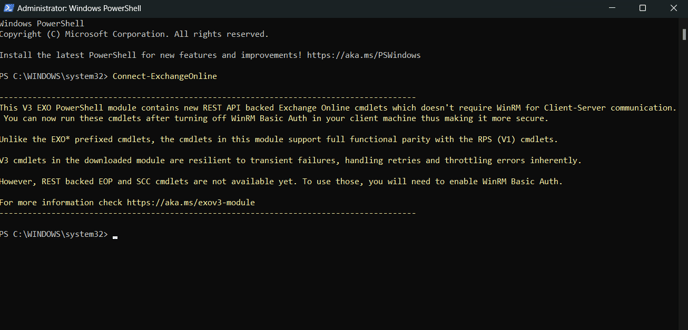
- After typing in the credentials, you should see a screen similar to this one:

If you do not see an error message (typically with red letters), it means you are correctly authenticated. - Run the following command to activate the necessary Exchange module:
Import-Module ExchangeOnlineManagement
After this, you will be signed in and can perform Exchange Management operations remotely. In here, you can find Microsoft's available documentation for Exchange PowerShell.
For Exchange 2013
Execute the following commands in PowerShell, where CAS FQDN is the fully qualified domain name of an Exchange 2013 Client Access Server:
$Credentials = Get-Credential
$Session = New-PSSession -ConfigurationName Microsoft.Exchange -ConnectionUri "https://<CAS FQDN>/PowerShell/" -Authentication Kerberos -Credential $Credentials
Set-ExecutionPolicy RemoteSigned
Import-PSSession $Session
You will be asked to supply valid Exchange credentials.
No matter if you are using Exchange Online or Exchange 2013, you should disconnect the remote PowerShell session when you are finished by executing the following command:
Remove-PSSession $Session
![Logo - Secondary White-1.png]](https://help.askcody.com/hs-fs/hubfs/Logo%20-%20Secondary%20White-1.png?height=50&name=Logo%20-%20Secondary%20White-1.png)