![Logo - Secondary White-1.png]](https://help.askcody.com/hs-fs/hubfs/Logo%20-%20Secondary%20White-1.png?height=50&name=Logo%20-%20Secondary%20White-1.png)
The IT team will, at this point, have given you the right user role and deployed the Bookings Add-in, so you can see and open the Add-in in your Outlook. To learn how to use the Bookings Add-in for Outlook, please follow these steps.
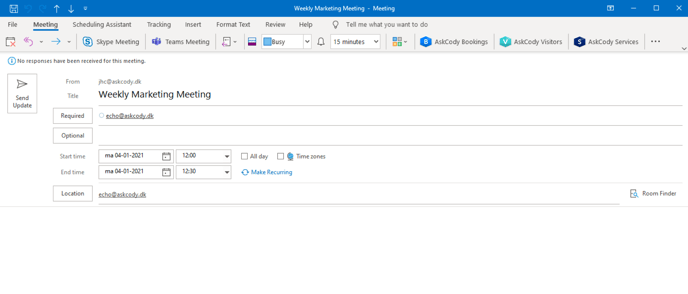
- Open your Outlook.
- Go to the Calendar and select New Meeting, or as you normally would. You can also just double-click on the selected date of your meeting in the calendar view.
- Type in the Subject of your meeting and invite your guests. Select the duration of the meeting and type in the start and end times. This will enable you to search for rooms that are available in a specific period.
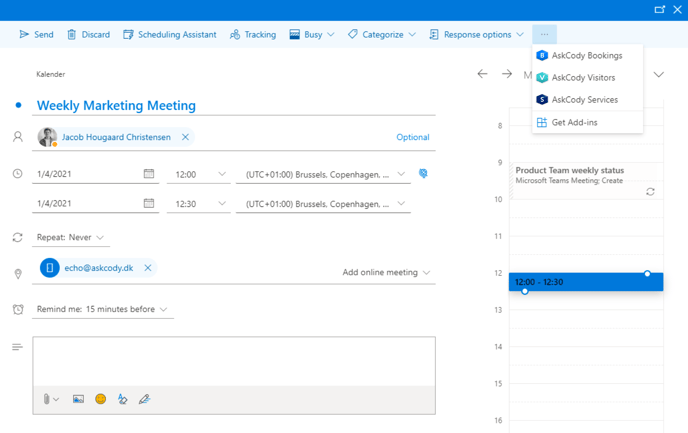
- Open the AskCody Bookings Add-in at the top of the Outlook window (ribbon).
- Select the criteria for the room you need for your meeting. In the Bookings Add-in, you are able to see the search criteria Location, Purpose, Equipment & Services, and number of Attendees.
- You can select multiple locations, purposes, and capabilities (equipment and services). However, there must be at least 1 location for the search to perform. When you have selected the criteria you are looking for, click on Find, and the search will begin.
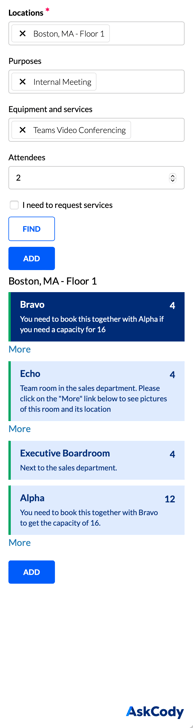
- When the search is done, you will be shown all of the resources that fulfill the selected criteria. By default, you will only be able to see the available resources, but if you click the box named "Show occupied resource(s)", the occupied resources that fulfill the criteria will also be shown.
- Each resource will be shown alongside its name, capacity, and a short description. Click on the resource(s) you would like to book and then click on Add resource.
Now the meeting room will be added as a room to the meeting. - Finish the meeting invitation by pressing Send in the Outlook window.