![Logo - Secondary White-1.png]](https://help.askcody.com/hs-fs/hubfs/Logo%20-%20Secondary%20White-1.png?height=50&name=Logo%20-%20Secondary%20White-1.png)
The AskCody Dashboard shows which meetings or activities are taking place right now, later, and where they happen. It is connected directly to your room calendars through the integration to your Microsoft 365 tenant, so it is continuously updated with the newest calendar events and information.
This article covers:
The Dashboard is made up of two parts:
- The Dashboard Template allows you to control what information should be displayed. This is also where you need to specify which of your connected calendars should be displayed and what time zone should be used.
- The Dashboard is the actual unique URL that will display the event information overview. When setting up the Dashboard, you decide the title screen header that is displayed and what Template the specific Dashboard should be using.
A Dashboard can only have one Template at a time, but a Dashboard Template can be used on multiple Dashboards at once. This enables you to change the displayed content on multiple Dashboards without having to edit each individual Dashboard. This also means that if no theme is selected on the Dashboard, it will use the theme set on the Dashboard Template instead. However, if a theme is selected on the Dashboard, it will use that theme instead of the theme set on the Dashboard Template.
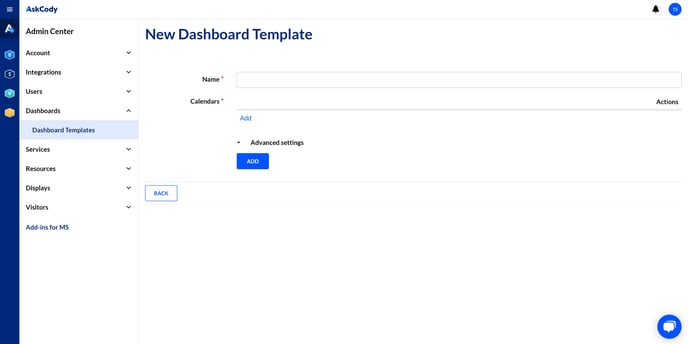
How to create a Dashboard Template
Go to Admin Center → Click on Dashboards and click Dashboard Templates → click Add → Fill in the information and click Add
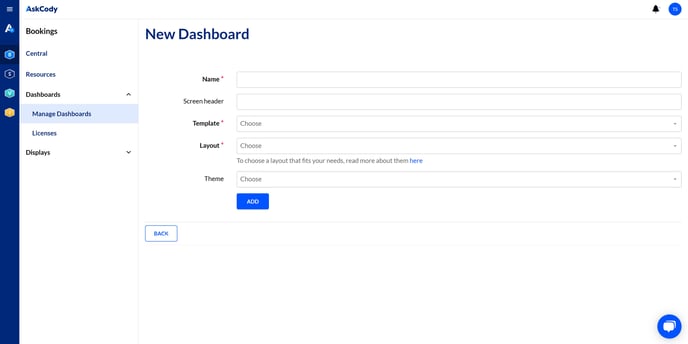
How to create a Dashboard
Go to Bookings in the top left corner → Dashboards and click Manage Dashboards → Click Add → Fill in the information and click Add
How to display a Dashboard on a screen
Follow this article on how to display a Dashboard on a screen.