
The AskCody Bookings Add-in helps you search for all calendar resources across multiple locations and is fully integrated with Outlook.
Employees can search and sort by the purpose of a meeting (e.g. video conference or external), equipment, or services (e.g. a whiteboard or catering), or capacity.
The Askcody Booking module consists of 3 parts:
- AskCody Bookings Add-in is the user interface that integrates with Outlook where employees can search for and add resources. The add-in is connected to Exchange through the connected service account, so the add-in will always have updated information on which calendars are available.
- Resources are the online overview of all your connected resource calendars. This is where you set up each calendar to match the relevant search criteria (purpose, equipment/services, and capacity) and configure the other AskCody Bookings Add-in features.
- Resources Admin Center is where you create the purposes and equipment/service that should be available when setting up the calendars in the Resources overview.
The requirements for setting up the AskCody Bookings Add-in
- Created an integration between AskCody and your Exchange resource (Click here to learn how)
- Added the connected resource calendars in Resources in the AskCody Management Portal.
- Make sure you have the AskCody role: AskCody Owner or Resources Administrator
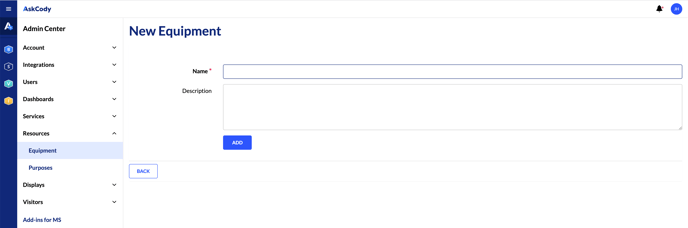
Step 1: Create capabilities
On the left panel go to Admin Center → Click on Resources and choose Equipment → Click Add → Name the capability and click Add
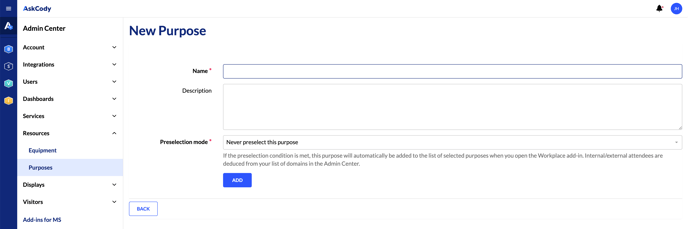
Step 2: Create purposes
In the left panel go to Admin Center → Click on Resources and choose Purposes from the dropdown → Click Add → Name the purpose and click Add
Step 3: Add resource calendars
In the AskCody Management Portal, click on Bookings in the left pane → Go to Resources → Click Add new resource → Connect the Exchange calendar and fill out the additional information related to this resource → Click Add.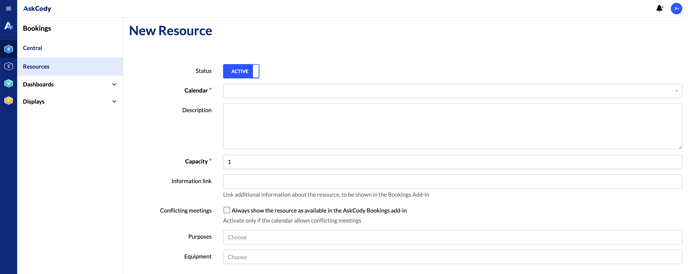
Step 4: Install the AskCody Bookings Add-in
From the left panel, go to Admin Center → Click on Add-ins for MS → Copy the AskCody Bookings Manifest URL to your clipboard (ctrl+c) → Install the add-in via Exchange Admin Center (click here to learn how) or via Powershell (click here to learn how).
For more information about Resource Scheduling and setting up the Bookings Add-in read the article Getting started with resource scheduling.